
Most product developers and engineers have gained a solid working knowledge of 3D printing over the years. Also known as additive manufacturing, the term covers a range of technologies, such as filament-based fused deposition modeling (FDM) that creates plastic prototypes, laser-curing processes that make parts from photopolymer resins, and powder-bed fusion machines that produce fully dense metal and plastic components.
All offer great potential for cost reductions when prototyping. Two of these technologies—selective laser sintering (SLS) and direct metal laser sintering (DMLS)—can cut costs through accelerated production; reduced tooling costs and work-in-process; less waste; and parts that remain strong despite being lighter in weight. SLS and DMLS are especially important to those thousands of companies that are 3D printing end-use parts. Examples abound:
- Lockheed Martin’s Juno spacecraft, currently in orbit around Jupiter, carries a dozen 3D-printed waveguide support brackets.
- Activated Research Company used DMLS to develop a radical new design for its Polyarc gas chromatography catalytic microreactor, bringing it to market in just 15 months.
- Raytheon uses 3D printing for rocket engines, fins, and control system components for guided missiles, producing parts in hours rather than days.
- Boeing set a world record in 2016 by building the largest 3D-printed item ever made, a fixture used in the construction of its 777 airplane, reportedly cutting weeks off its manufacturing time.
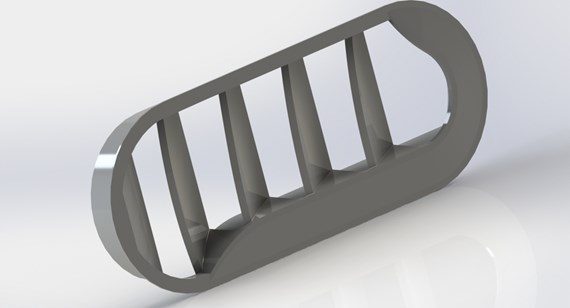
- Brunswick Corporation used 3D printing for air conditioning grills on its Sea Ray yachts, eliminating the need for disposable tooling and speeding product development.
In these cases, results included greater functionality, lower weight, reduced manufacturing costs, and oftentimes all three. Here are six design considerations that made these benefits possible:
1. Optimize the Design
Well-designed 3D printed parts follow many of the same rules as those made with injection molding. Use gradual transitions between adjoining surfaces. Eliminate large differences in cross section and part volume. Avoid sharp corners that often create residual stress in the finished workpiece. Watch that thin unsupported walls don’t grow too tall, or else buckling or warping may occur. Also, surfaces with shallow angles tend to leave ugly “stair-stepping” that makes them unsuitable for cosmetic features—flatten them out where possible.
2. Throw Out Tradition
The most dramatic 3D printed part designs leverage 3D’s ability to create “organic” shapes, such as honeycombs and complex matrices. Don’t be afraid to use these shapes, provided doing so creates a lighter, stronger part. Nor should you fear placing holes—lots of them—into your part design. With traditional manufacturing, drilling holes in a solid block of material increases part cost and waste. Not so in the additive world, where more holes mean less powder and less processing time. Just remember, 3D printed holes don’t need to be round. Quite often, an elliptical, hexagonal, or free-form hole shape would better suit the part design and be easier to print.
3. Consider Next Steps in the Design Cycle
Just because you can print parts with lots of holes, however, doesn’t mean you should, especially if the plan is to make lots of such parts later on. Because 3D printing offers tremendous design flexibility, it’s easy to paint yourself into a corner by not considering how parts will be manufactured post-prototyping. Based on our examples at the start of this design tip, an increasing number of companies are finding 3D printing suitable for end-use parts, but many parts will transition from printing to machining, molding, or casting as production volumes grow. That’s why it’s important to perform a design for manufacturability analysis early on in the design cycle, assuring cost-effective production throughout the part’s life cycle.
4. Avoid Secondary Operations
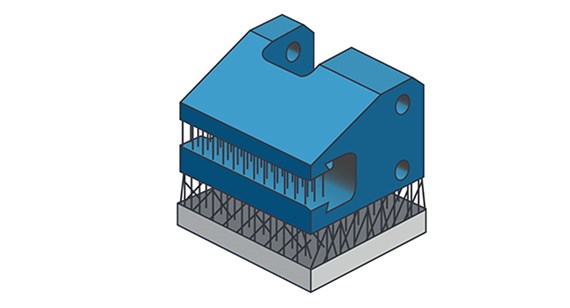
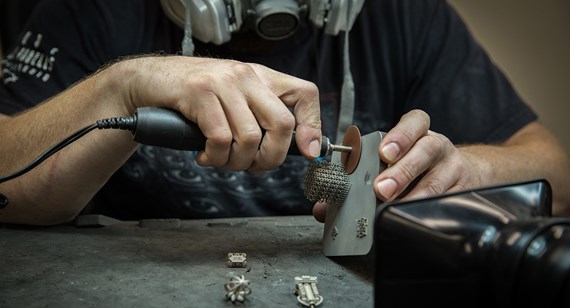
Plastic parts produced via SLS need no support structures during the build process, so post-processing is usually limited to bead blasting, painting, reaming, and tapping of holes, and machining of critical part features. DMLS, on the other hand, often requires extensive scaffold-like structures to support and control movement of the metal workpiece—without them, surfaces may curl and warp. This is especially true with overhanging geometries—wide T-shapes, for example, which require build supports beneath the arms, and will have to be machined or ground away, thus increasing cost and lead time. The story is similar but less dramatic with SL, where cured resin supports are easily removed with a hand grinder and some sandpaper. Where possible, Brazil Metal Parts will work to orient parts in such a way to reduce these overhangs and other unfriendly features, but part designers can help by minimizing their use in the first place.
5. Watch the Tolerances
Designers and engineers should avoid “over-tolerancing” their parts—doing so may force them to be built using thinner layers (increasing build time and cost), and will in many cases call for secondary machining operations to meet overly zealous print dimensions. And because 3D printing offers so many opportunities for part count reduction, there’s less need for super accurate fits between mating surfaces anyway, just one more example of how this technology reduces manufacturing costs.
6. Look at the Big Picture
3D printed parts might cost more up front, but don’t let that scare you. With additive, you have tremendous possibility for part count reduction, reduced weight and greater structural integrity, lower assembly costs, internal passages for cooling or wiring, and other part features that are not possible with traditional part designs. Also, keep in mind that fixtures, molds, and other types of tooling are not needed with 3D printing, eliminating costs that might not be directly associated to the price of the individual piece part. Focusing on the part’s price tag, rather than product functionality and “the big picture,” may leave you designing the same parts you did yesterday, eliminating opportunities to reduce overall manufacturing costs.
Learn more about 3D printing with our materials white paper, “Selecting the Right Material for 3D Printing.”
As always, feel free to contact us with any questions, at +86-755-29729151 or [email protected]. To get your next design project started today, simply upload a 3D CAD model at brazilmetalparts.com for an interactive quote within hours.
Sources: Brazil Metal Parts, Concept Laser Corp., EOS. Inc.